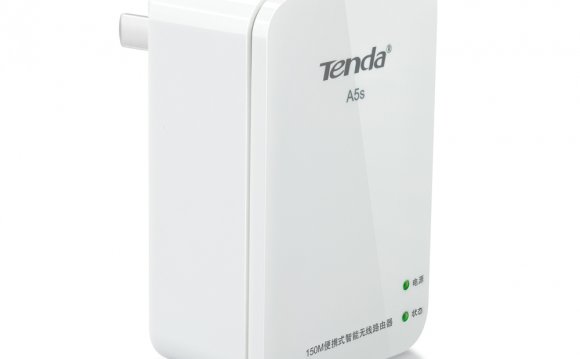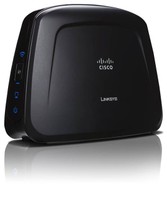
 Nearly every piece of modern AV gear can connect to the internet, but many of them only offer hard-wire connections. And it isn't always possible, or worth the effort, to run an Ethernet cable to an equipment rack. Luckily, there are a couple methods to get an internet signal to a remote piece of gear, without ripping up your home running wires or spending hundreds of dollars. In this brief article, we offer two solutions to this common problem.
Wireless Bridge With Optional Switch
If you already have a wireless router and strong wireless signal in the area your equipment is located, then all you need to do is add a bridge. You might find people refer to these as wireless access points (WAP), but a WAP does the opposite of a bridge. A WAP allows wireless devices to connect to a wired network. An example of this is a wireless router. A bridge allows a hardwired device to connect to a wireless network.
A bridge is a device somewhere between the size of a flashdrive and a router. Typically, they only have two jacks, power and Ethernet. Setting up a bridge is fairly straight forward, but I highly recommend reading the instruction manual because each device can vary. Set up usually consists of two basic steps:
Rear View of Wireless Bridge
Step 1) Connect bridge to wireless network - If your bridge and router are compatible with what's called WPS, then you can just press the WPS button on both devices and the bridge will connect to your wireless network automatically (hopefully, anyways). If not, then you will want to connect the bridge to a computer (preferably one that is currently on the wireless network) using a CAT5 or CAT6 cable. The ends of these cables look like wide phone cords. At this point, you will need to refer to the instruction manual. Most of the time you will open up and web browser and type in the IP address of the bridge (found in the manual). However, some modern bridges automatically take you to the setup page when you open your browser.
Step 2) Connect bridge to AV equipment - Once the bridge is connected to the wireless network, you simply need to connect a CAT5 or CAT6 cable from the Ethernet jack on the bridge to the Ethernet jack on your AV equipment. There is no special setup to perform on most AV equipment. If you want to connect more than one piece of gear to the internet, using the bridge, then you will need a switch. In its simplest form, you can think of a switch as a splitter (please, no hate mail for calling it a simple splitter) that takes one Ethernet cable and splits it out to more connections, usually 4 or more. Below is an image of Belkin 5-port switch. One of the ports is used to connect the switch to the bridge, leaving 4 open ports for connecting other devices. A switch is only needed if you want to connect more than one device using the bridge. If your bridge has multiple Ethernet jacks, that means a switch is already built-in.
Belkin 5-Port Network Switch
2) Ethernet Over Powerline Kit
Okay, this isn't technically wireless, but sometimes it's difficult to get a strong wireless signal into certain areas of a home, in such cases, an Ethernet over powerline kit can be used. These kits utilize the existing electrical wire in your homes to extend the network. They usually come with two wall-wort style adapters, and unlike wireless bridges, there is virtually zero setup involved. One of the adapters is located where your router is at. It plugs into the wall for power and connects to the router via a CAT5 or CAT6 cable. The other adapter is located by your AV equipment. Again, it connects to power and then to your equipment using a CAT5 or CAT6 cable. If you want to hook up more than one device, you can either purchase a powerline kit with a built-in switch, or add one yourself.
Ethernet Over Power Line Kit With Switch
Conclusion
There you have, two quick and easy methods to get your equipment connected to the internet. A wireless bridge works well if you have a strong wireless network. Otherwise, powerline kits are also very fast and reliable, but can have troubles working in larger homes. Both devices come in a variety of form factors from numerous companies, and can be purchased at most big box retailers or online. Expect to spend between $50 and $100 dollars.
For those with an old LinkSys Wireless Router lying around who aren't afraid to do some firmware flashing, you can achieve a similar result with DD-WRT; I've been using this (converted wireless bridge) configuration for a few years now and still have a couple of extra Ethernet ports for my home theater.
Cliff, thanks for the informative article. I recently upgraded to a 50MB Cable Internet service from Comcast and went through figuring this out on my own. I ended up installing a Linksys EA-6500A along with a Linksys WUMC-710 Wireless AC Media Connector. Here are links to both for reference:As someone mentioned earlier, 802.11 AC is the new wireless 5GHz draft standard. I have been extremely pleased with the results. I currently have my Squeezebox, Blu-Ray player and Xbox hooked up to the bridge. One benefit to this is that even though some of these legacy devices support wireless, it is older 802.11 a/b. By wiring them to the bridge, they get the benefit of much higher bandwidth without having to buy new adapters (when available) or upgrading to next-gen equipment. Setup is a breeze because the products are from the same Mfr and are designed to work together seamlessly. I am able to consistently stream HD video without a hiccup. Also, because the router supports two discreet channels, I am able to make the one the Bridge uses “AC Only” and force all of my legacy traffic to the other channel. This assures that the entire 5G band is reserved for devices connected to the bridge.
I should point out that this is probably NOT a solution for every environment. Because I have a direct line of site–window to window–from the router to the access point, there is nothing in the way to interfere with the signal. And while the 5G signal is supposed to be strong enough to paint a fairly large area with useable signal, I would want to see it in real world use before I commented upon the capabilities when walls and multiple floors were involved. But for my situation, this has proven to be a very good, stable solution that let's me leverage my increased bandwidth.
YOU MIGHT ALSO LIKE


